How to add custom CSS in WordPress that survives a theme change
Appearance → Customize → Additional CSS dies on the next theme switch. Put the same rules in a Styles snippet instead.

Don’t open Appearance → Customize → Additional CSS. Don’t paste into a theme’s custom-CSS field. Don’t open a child theme’s style.css for three lines you want forever. Theme updates put those files back. Switch themes and the CSS is gone even sooner.
I keep that CSS in FluentSnippets. One Styles snippet. Files under wp-content/fluent-snippet-storage, not in the theme. Change themes whenever you want. The rules stay.
When this is the wrong post
If a page builder already owns your global CSS, leave it there. Don’t paste a second copy into a snippet and fight two sources.
If you are building a theme you will ship to other people, the styles belong in the theme. Don’t peel them into a snippet on your laptop and forget them.
If you only need one temporary tweak while you design, that Customize box is fine for that hour. This walk is for CSS you want to keep after you close it.
Install FluentSnippets
Get it from WordPress.org or from our get page.
In wp-admin go to Plugins → Add New. Search FluentSnippets. Click Install, then Activate.
No account. Open FluentSnippets in the left menu. You’re on the snippets list.
Pick Styles, not Functions
This is plain CSS. Not PHP. Not a tracking tag.
Open FluentSnippets.
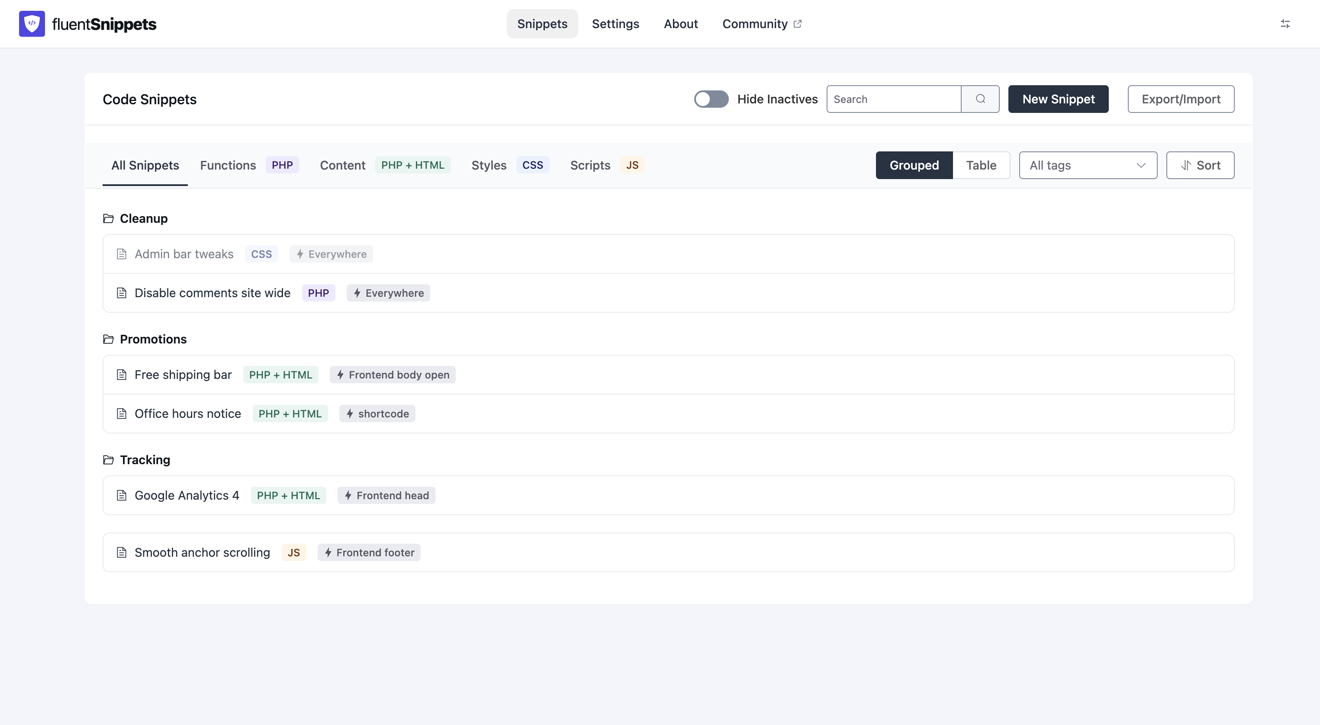
Click New Snippet.
Create New opens. Functions (PHP) is already selected. That’s the wrong type for this walk. Click the blue Styles (CSS).
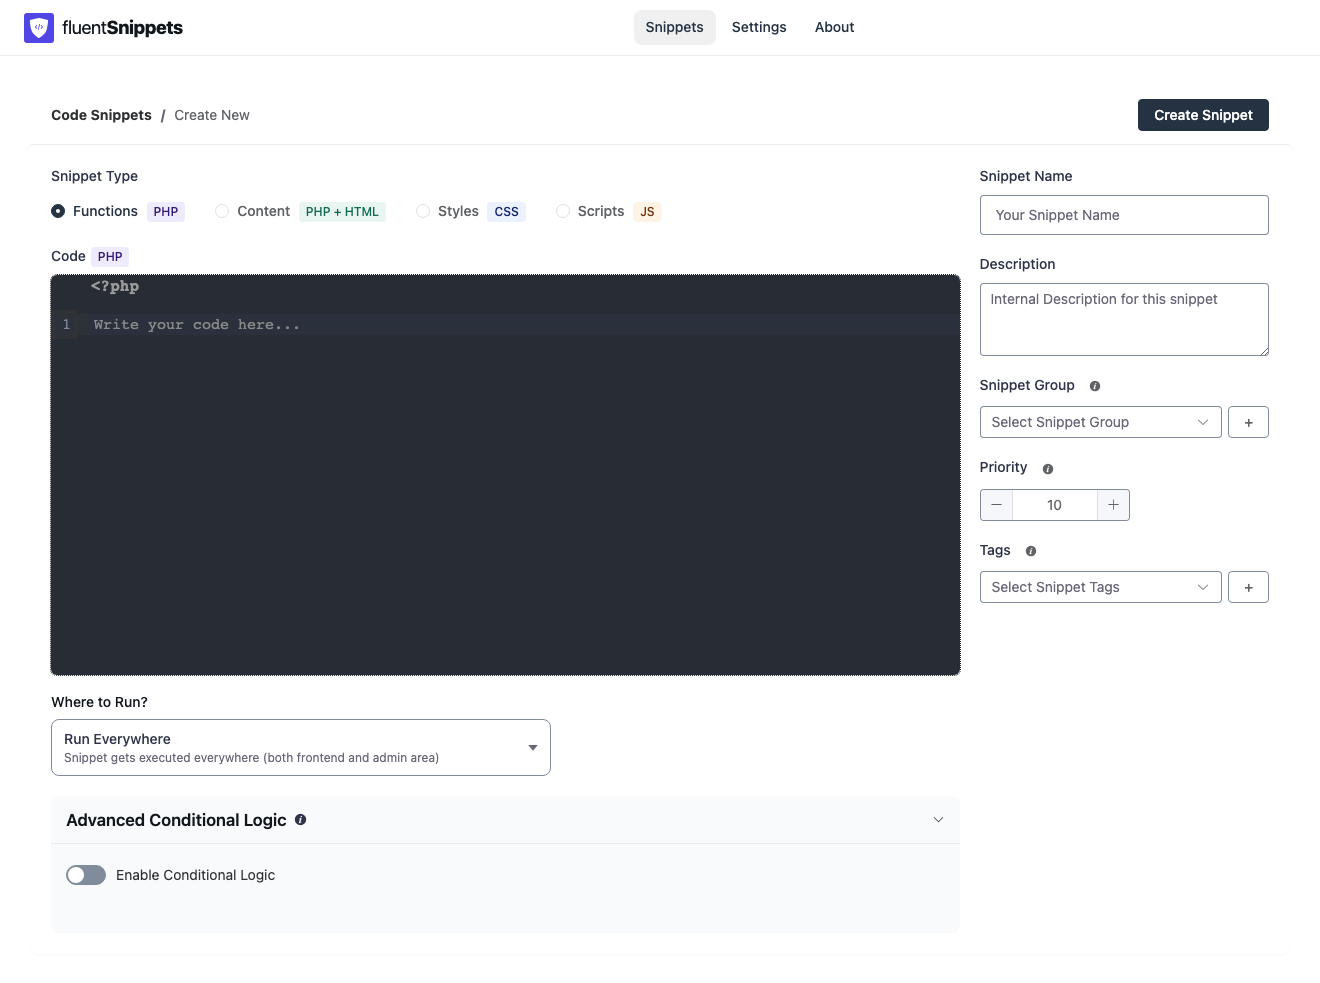
Name it Tighter entry titles. Description, group, and tags can wait.
Open Where to Run?. For public page CSS pick Frontend. Use Backend only when the rules belong in wp-admin. Use Both Backend and Frontend when you want the same rules in both places.
Paste the rules, not a style tag
Write the CSS only. FluentSnippets wraps it in a <style> tag for you. If you paste a leading <style>, the plugin refuses the save.
This is a tiny, safe example: slightly tighter letter-spacing on post titles.
.entry-title {
    letter-spacing: -0.02em;
}
Paste that. Swap the selector if your theme uses a different class for titles. Keep the paste small until you know it lands.
Click Create Snippet. Check the rules. Publish it. You want the green published badge.
Two Styles-only checkboxes
Styles snippets get two sidebar options the other types do not.
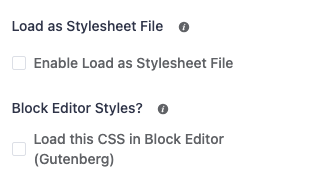
Leave Enable Load as Stylesheet File off for a handful of rules. The CSS prints inline. Tick it later if the block gets large and you want the browser to cache a real .css file.
Tick Load this CSS in Block Editor (Gutenberg) when you want the same rules inside the editor canvas, so writing matches the front.
For this entry-title tweak, Frontend is enough. Leave both boxes alone unless you need them.
The list after it is on
Go back to the snippets list.
View a public post. The titles should sit a hair tighter. Switch themes when you want. The snippet file is still under wp-content/fluent-snippet-storage, so the CSS is still there.
One rule to keep
If you would have pasted CSS into the Customizer, put the same rules in a Styles snippet instead. Theme updates and theme switches cannot eat a published snippet.
How to stop editing functions.php in WordPress if the next paste is PHP. Styles (CSS) snippets for run locations and the two Styles-only checkboxes.